PAGE ONE: THE MAKING OF DANNY TORRANCE, A PHOTO JOURNAL.
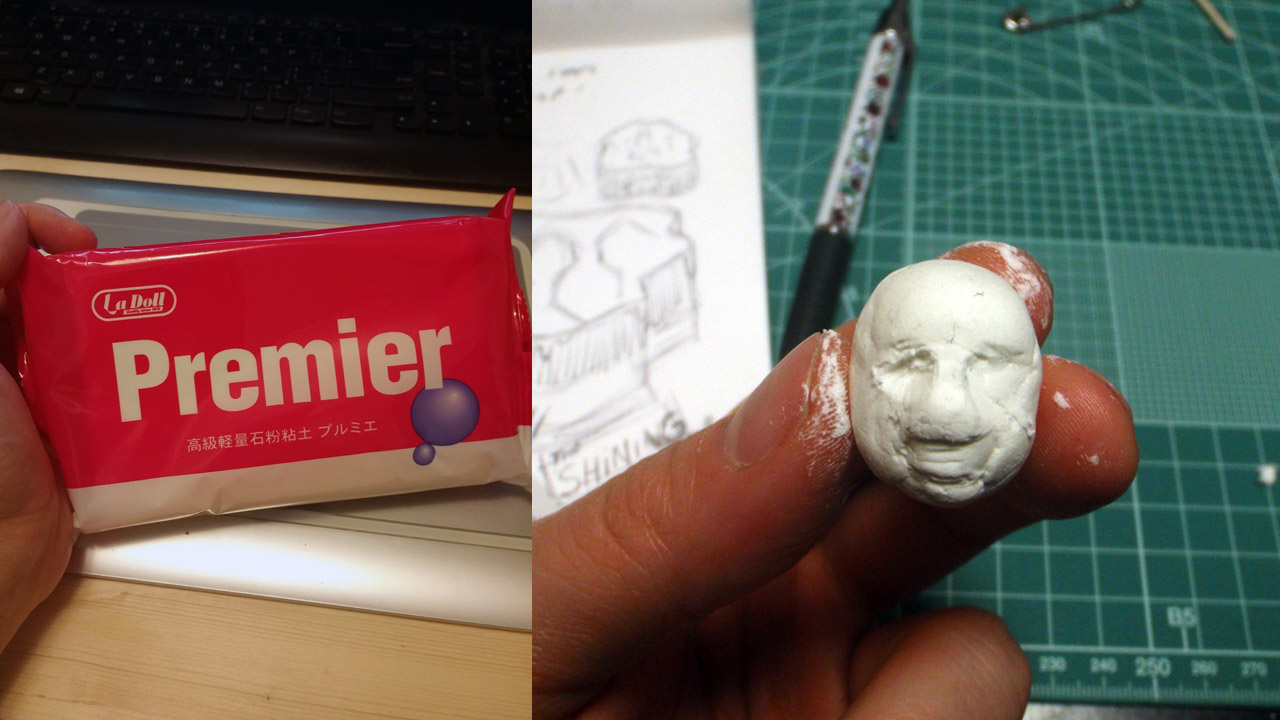
I used Padico's LaDoll series Premier stone clay to sculpt Danny. Mentioned every chance I get, this clay is super lightweight and strong. Able to hold the finest detail!
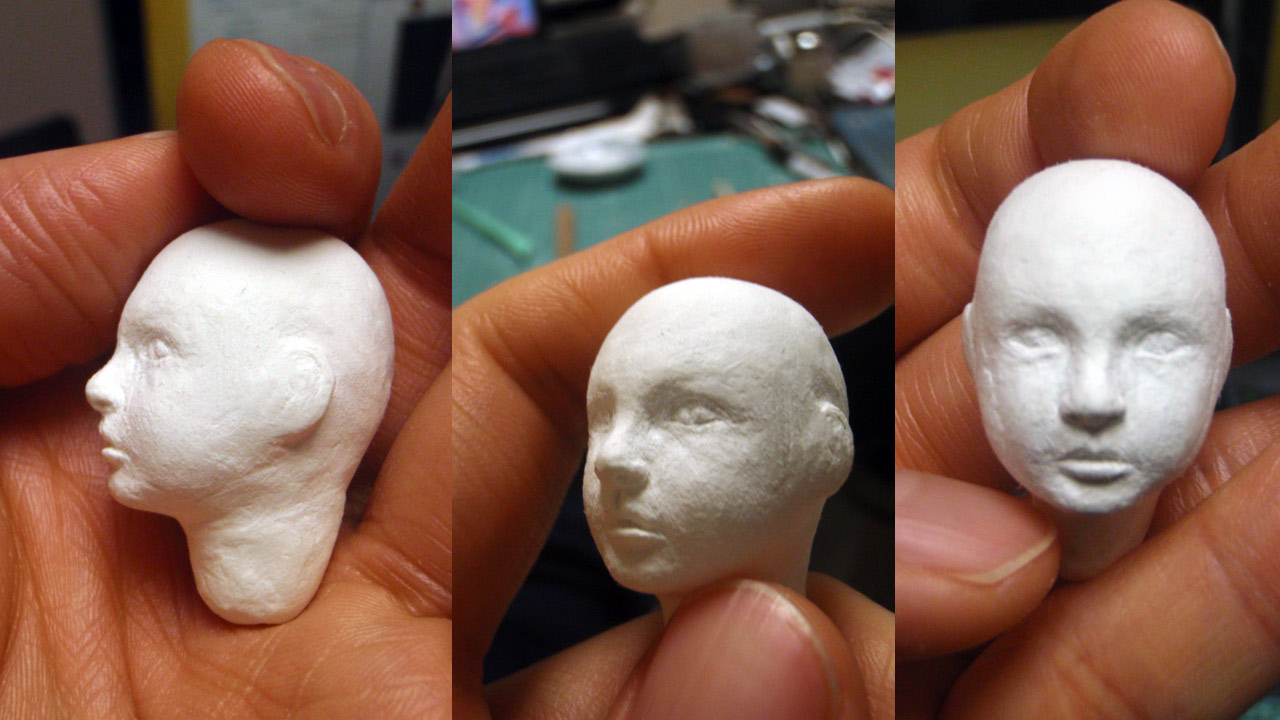
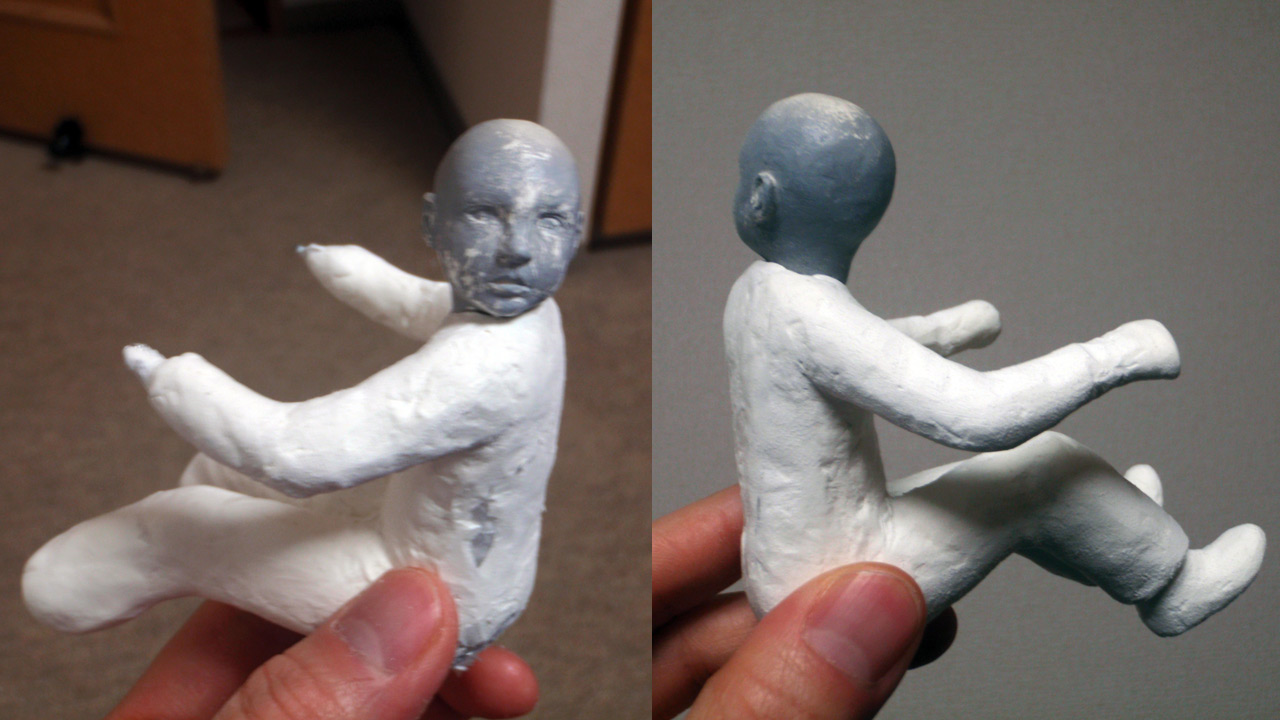
There's no secret to sculpting the face. It's eyeballing and refining; adding clay where is needed and removing any excess. Repeat until you're ready to move on.
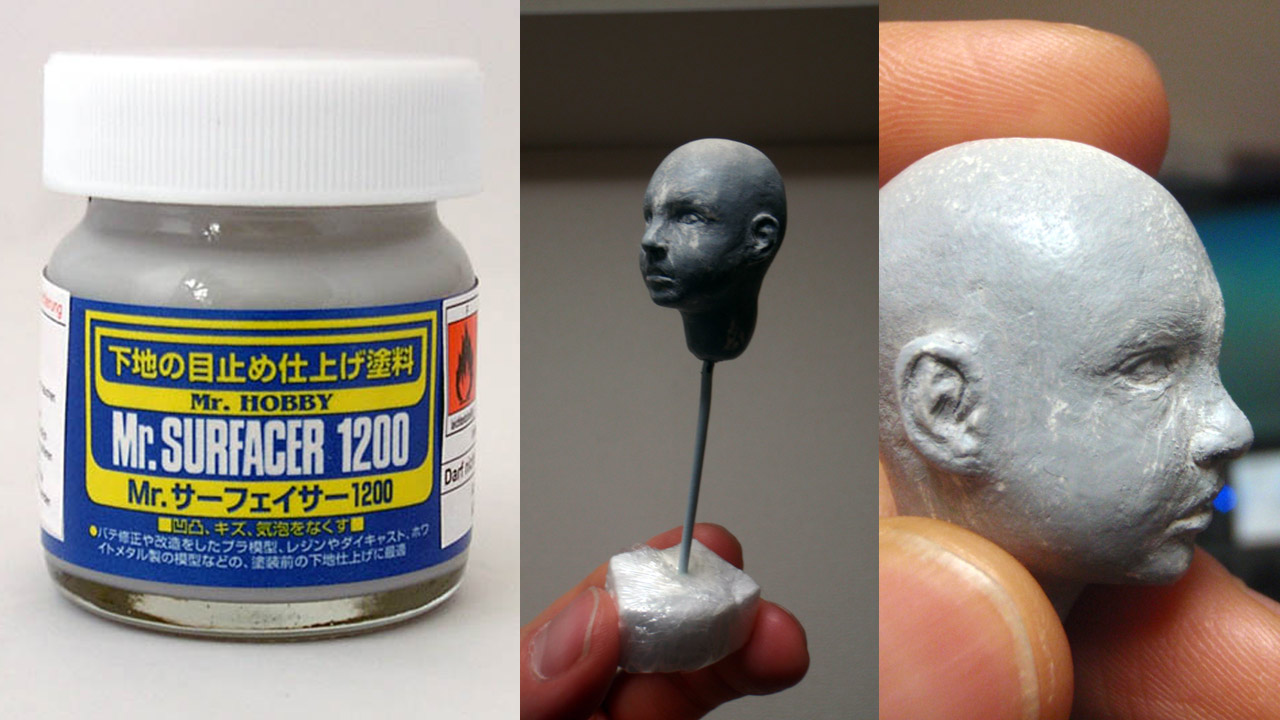
My go to primer is Mr. Hobby's Mr. SURFACER 1200. Again, the fine features of the face were slightly altered because of the primer thickness even with it thinned out. The troubles
of working on this scale...
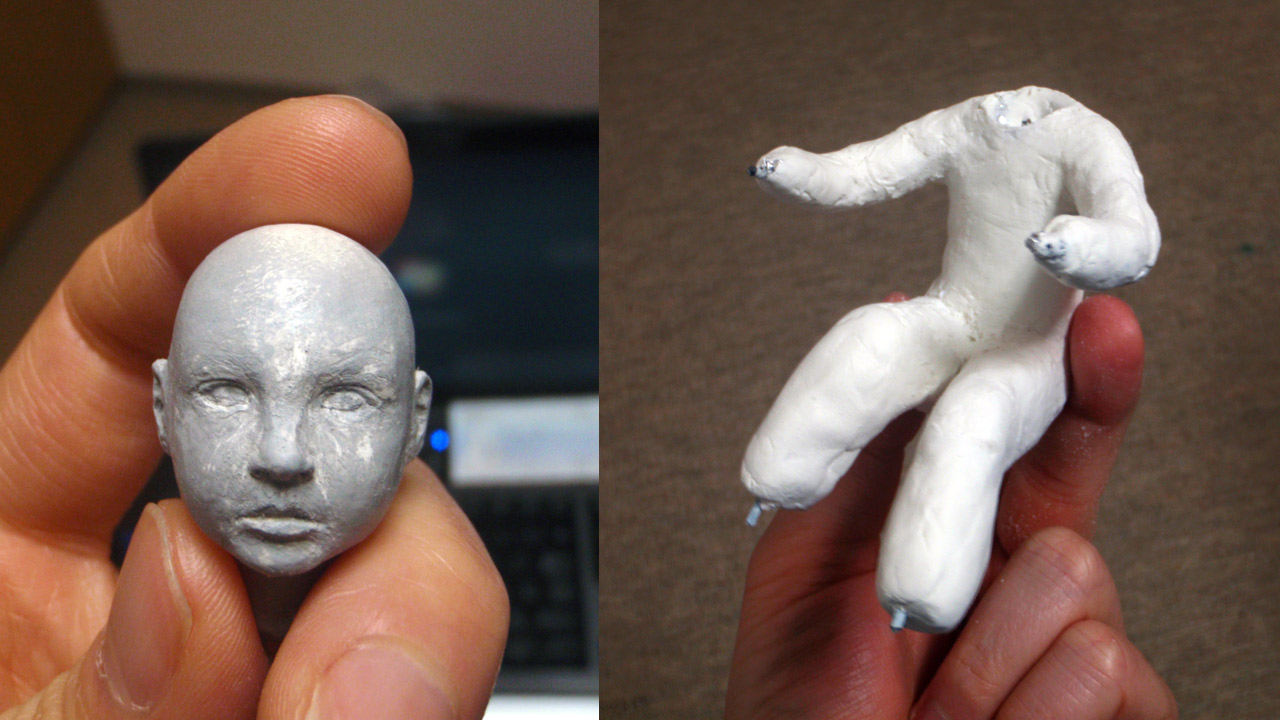
Once the primer has dried, I can begin sanding and polishing to get back some of the fine details such as eyelids, nostrils, the ears and eyebrows. The body is next. Can you guess how I made it?
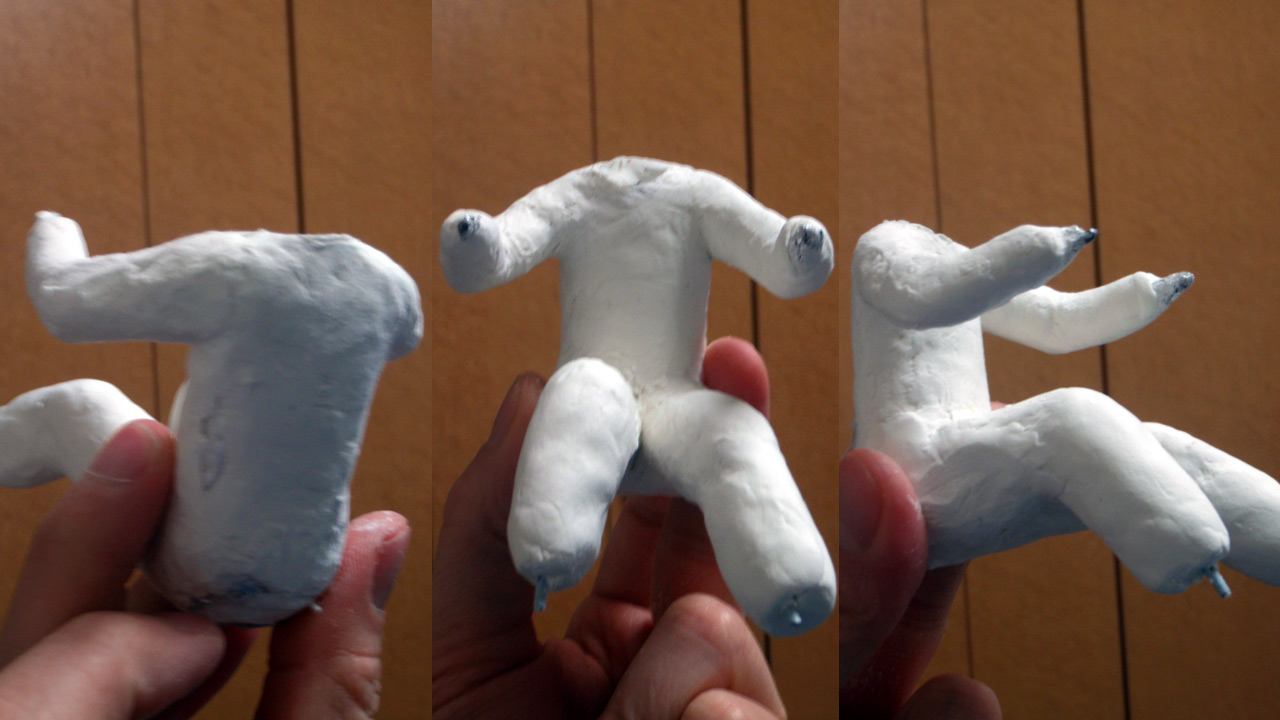
That's right! Wire. From a coat hanger. I bent it into the general pose and padded the wire armature with small pieces of styrofoam. The goal was to keep this statue piece lightweight.
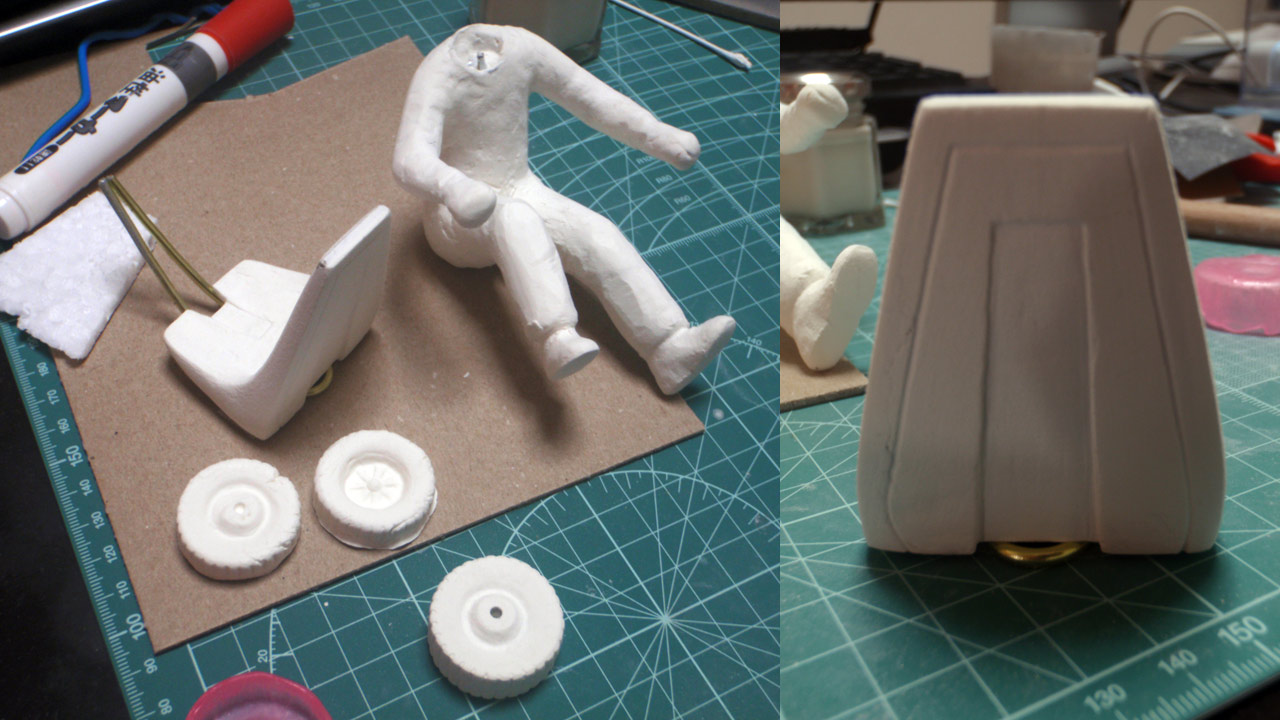
Positioned Danny's head and tweaked the neckline to fit snuggly. Gave him very basic hands and feet for the purpose of constructing his ride: the big wheel trike (handlebar and pedal position).
Danny's big wheel seat may look sculpted in solid clay, but it's not entirely. Inside is actually paperboard. Once the clay coating dried, I was able to carve out the details.
Next were the tires and because they're identical, I sculpted one tire and made two moulds for each side using thermo plastic. The tricky part after was joining the two halves seemlessly.
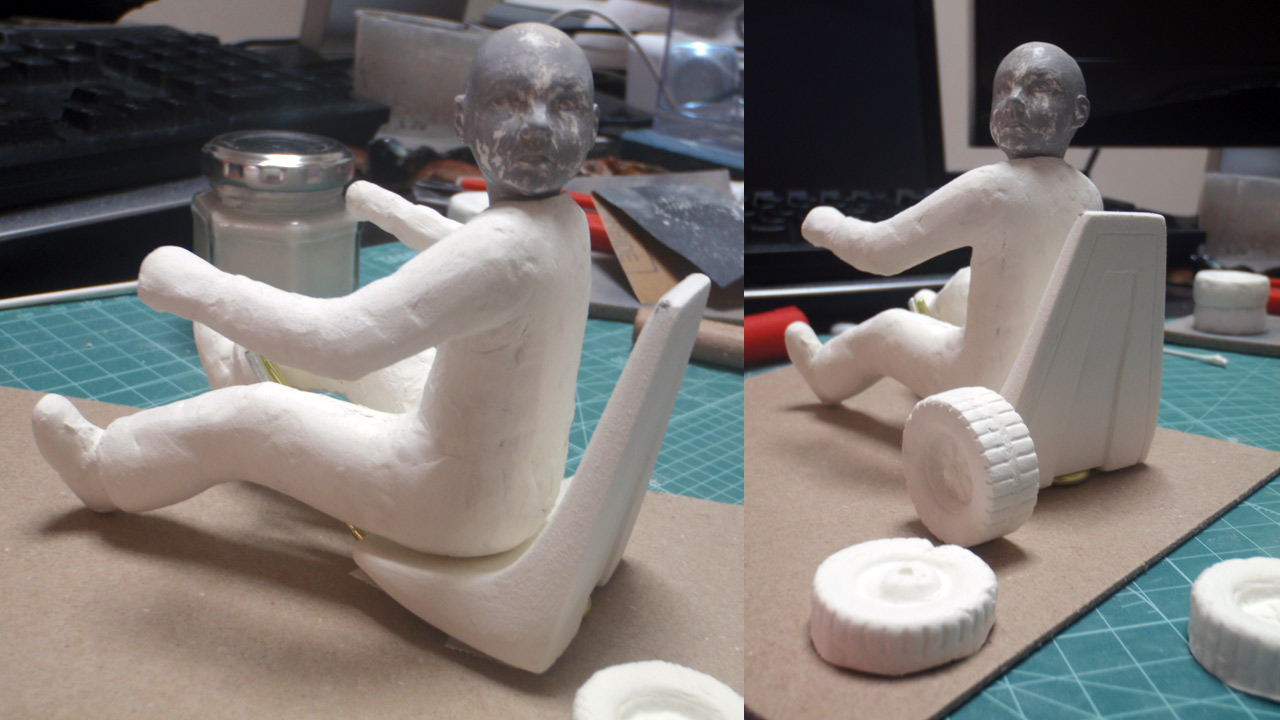
Setting Danny onto the seat balanced was just a matter of sanding down his butt to conform to the seat. With his stubby hands and feet in place as markers, I could
begin to construct the front of the trike. In the previous photo, you can see aluminum wiring used for the trike's frame. Quite easy to form with a pair of pliers.
Don't hesitate to email me at martengo or via if you have any questions regarding my Danny Torrance PD statue or work process. Especially if you are following these steps as a guide to making your own statue.